Introduction
Before you even think about painting, framing, or laying flooring, one step is critical—waterproofing your basement. Ignoring moisture issues can lead to long-term structural damage, mold growth, and wasted renovation budgets. Whether you’re tackling a full remodel or just planning, this guide will walk you through how to waterproof your basement before finishing it.
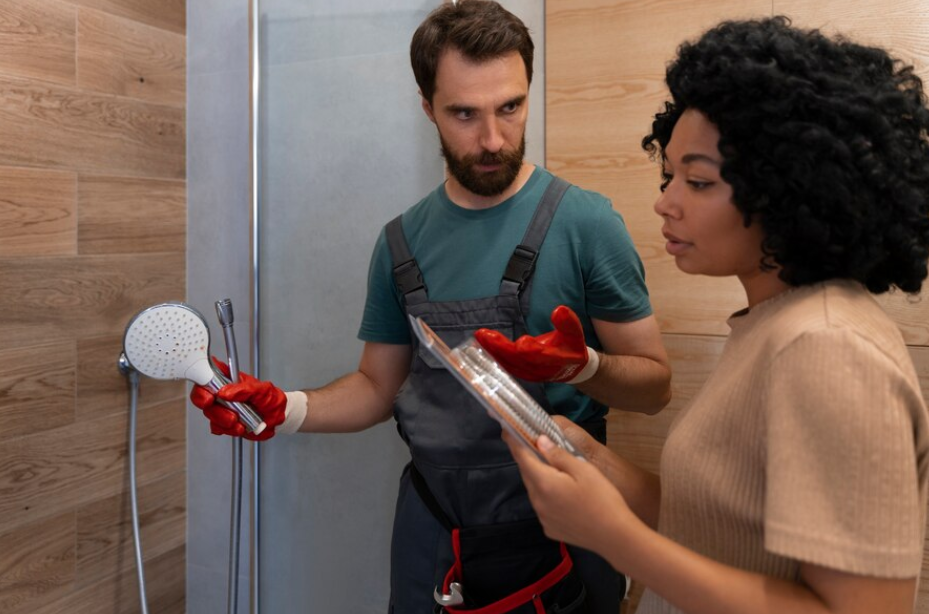
This process is essential if you’re searching for basement waterproofing near me —a clear signal that professional help may be necessary.
Why Basement Waterproofing Should Be Your First Step
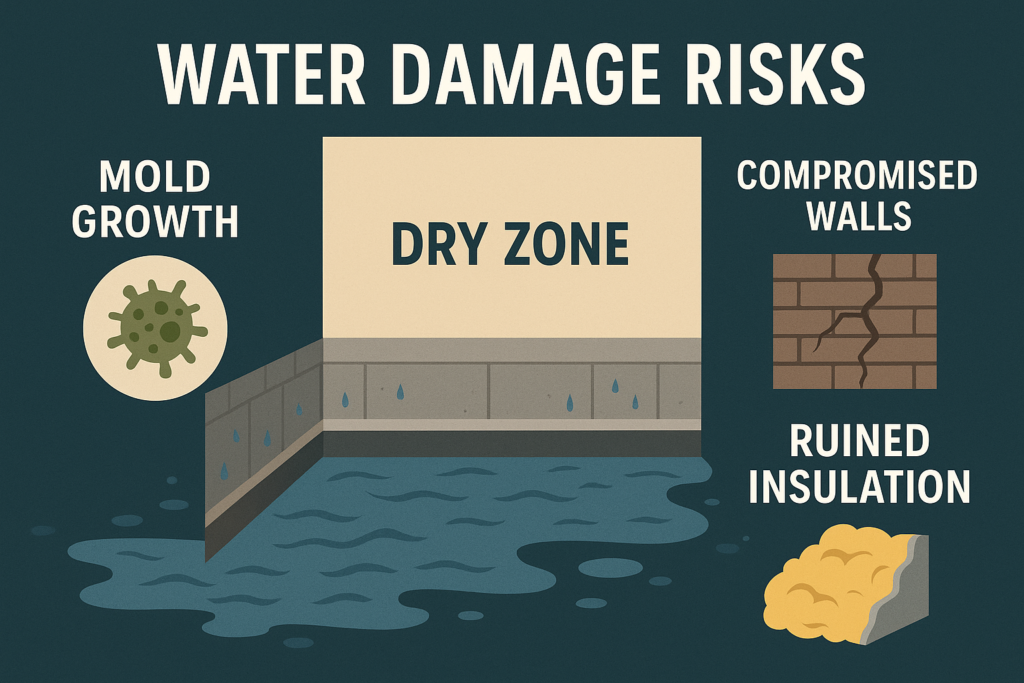
Waterproofing isn’t just a precaution—it’s the essential first step in transforming your basement into a functional, livable area. A basement that hasn’t been properly sealed is vulnerable to a wide range of problems, including mold infestations, warped flooring, and damage to expensive finishes like drywall and insulation. Moisture buildup doesn’t just compromise comfort; it creates serious health and safety risks.
Taking the time to waterproof upfront protects your investment, enhances your home’s structural integrity, and prevents the need for costly repairs down the line. Addressing these issues before you start framing walls or installing flooring ensures the long-term success of your basement renovation.
One of the most overlooked components is foundation waterproofing. Without a strong, sealed foundation, no amount of interior work will stand the test of time. Consider it the backbone of your project’s durability and comfort.. When moisture seeps in, it can ruin insulation, warp flooring, and invite dangerous mold. Waterproofing improves not just comfort but the resale value and health of your home.
One of the most overlooked areas is foundation waterproofing. If your home has cracks or poor grading, this should be addressed first.
Signs Your Basement Needs Waterproofing
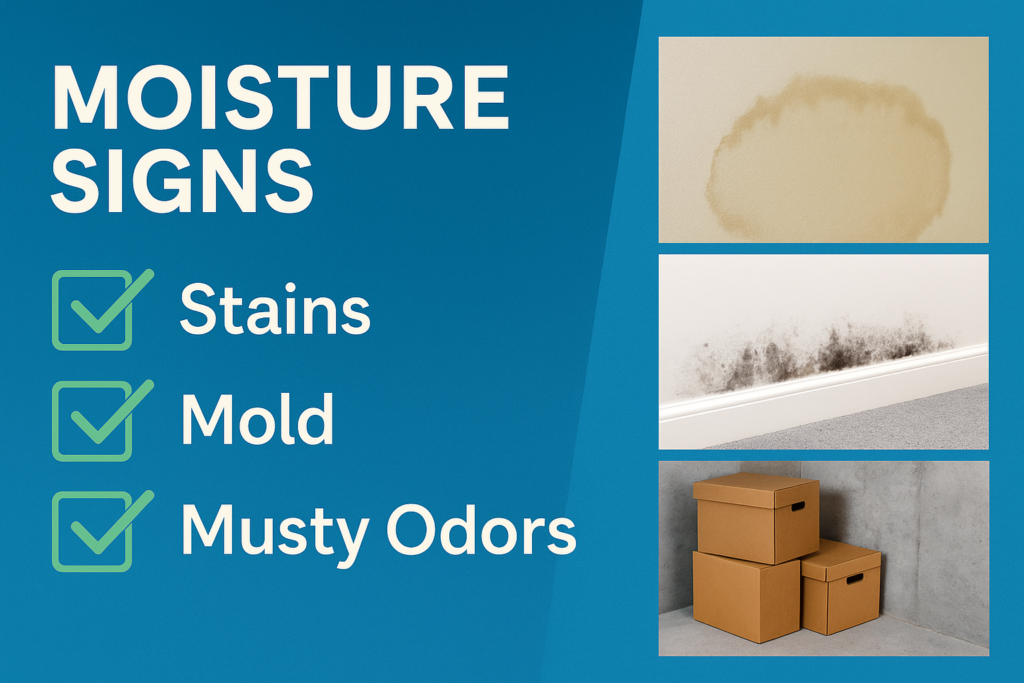
Recognizing early signs of water intrusion can save homeowners thousands in potential damage. A basement doesn’t need visible flooding to be at risk—subtle clues often point to underlying moisture problems. If you’ve noticed odors, visible staining, or an unusual chill or dampness in the air, it’s time to investigate further. Catching these signs early means you can address small issues before they escalate into costly structural repairs or health concerns related to mold and mildew.
Before investing in finishes or furnishings, check for these warning signs:
- Damp, musty smell
- Water stains or condensation on walls
- Efflorescence (white powdery deposits)
- Cracks in walls or floors
- Mold or mildew spots
If you spot any of these, your home will benefit greatly from waterproofing inside basement methods and external drainage solutions.
Interior vs Exterior Waterproofing Methods
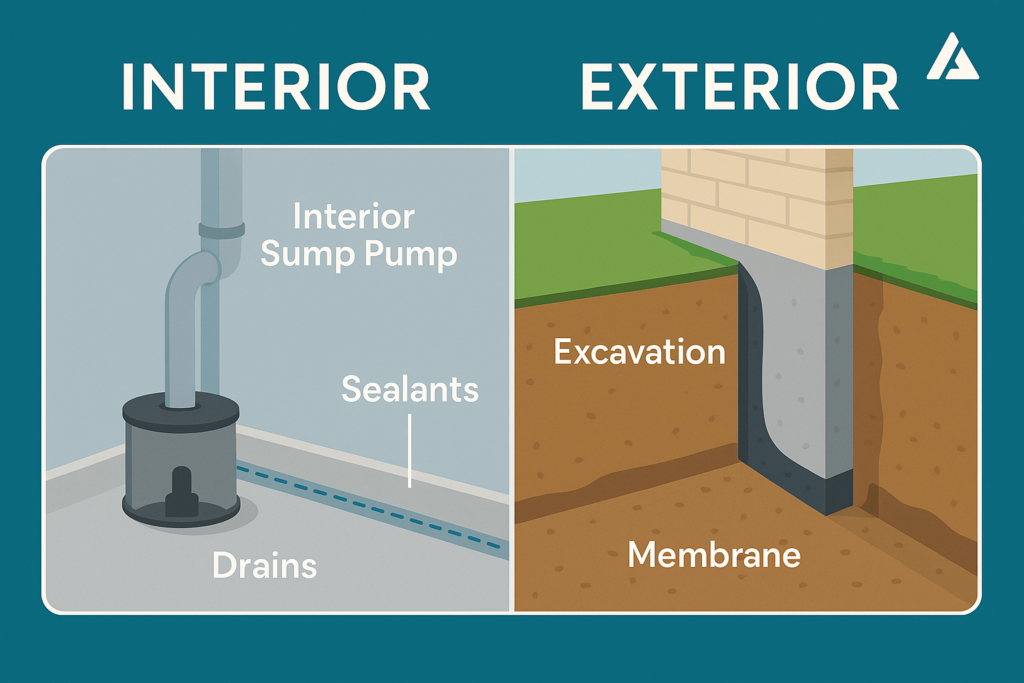
Understanding the difference between interior and exterior waterproofing is essential before beginning a basement renovation. Interior methods are typically used to control water after it has entered the space. They’re great for fixing dampness, minor leaks, or condensation. Exterior solutions, on the other hand, focus on prevention by keeping water out in the first place. Choosing the right method—or a combination of both—depends on the severity of your water issue, budget, and long-term plans for the basement.
Interior Waterproofing
Interior waterproofing methods are designed to manage moisture that has already entered your basement. While they don’t stop water from getting in, they effectively channel it away from your walls and floors to prevent damage. These solutions are often less expensive than exterior methods and can be installed with minimal disruption.
Common techniques include:
- Sump pump installation to remove accumulated water automatically
- Interior French drains that guide water to the sump pump
- Vapor barriers are applied to walls to block moisture from seeping through
- Dehumidifiers that help regulate indoor humidity and prevent mold
These waterproofing systems inside the basement are ideal for homes that experience occasional leaks or dampness rather than major flooding. They’re also quicker to install and are often used in conjunction with exterior methods for optimal protection.. These include:
- Sump pump installation
- Interior French drains
- Vapor barriers and wall sealants
- Dehumidifiers to control humidity
These waterproofing inside basement are great for homeowners facing minimal hydrostatic pressure.
Exterior Waterproofing
Exterior waterproofing is a comprehensive solution that tackles moisture problems at their source—outside the foundation walls. Though it requires more time, labor, and cost, it’s often the most effective method for keeping basements permanently dry. By preventing water from ever reaching the basement interior, you eliminate the need to manage it after entry.
Key methods include:
- Excavation around the perimeter of your home to expose the foundation walls
- Application of waterproof membranes or coatings to the exterior foundation
- Installation of exterior French drains to reroute groundwater away from the home
- Landscaping adjustments like regrading soil and extending gutters to direct rainwater further from the foundation
While more disruptive, exterior waterproofing provides a long-term fix and is especially recommended for homes with consistent or heavy water intrusion., this method stops water from ever entering:
- Excavation and exterior membrane coating
- Exterior French drains
- Proper grading and gutter extensions
Combining both methods often yields the best results.
Step-by-Step Guide to Waterproofing Before Finishing

Waterproofing isn’t a one-size-fits-all solution. It’s a multi-step process that requires attention to detail, patience, and a clear understanding of where moisture enters your basement. Whether you’re taking a DIY route or working with professionals, following these sequential steps ensures your basement remains dry, safe, and ready for finishing. This guide breaks it down so you can confidently protect your investment.
Step 1: Inspect and Diagnose
Begin with a thorough inspection to understand where and how water enters your basement. Look for signs like water stains, musty odors, and visible cracks. Use a moisture meter to measure dampness levels on walls and floors. You can also perform a water hose test outside your foundation to detect infiltration points.
If in doubt, consult a waterproofing professional to conduct a full diagnostic assessment. Identifying the source is crucial before applying any solutions—surface treatments won’t work if the real problem lies in foundation cracks or inadequate drainage.. Use moisture meters or hire a specialist.
Step 2: Repair Foundation Cracks
Once leaks are identified, seal any visible cracks in the foundation. Small, non-structural cracks can often be addressed with epoxy injections or polyurethane foam, which expand to fill voids and prevent water ingress.
However, if cracks are wide, horizontal, or accompanied by wall bowing, they may signal structural issues. In these cases, a structural engineer should assess the damage, and repairs might require reinforcement or rebuilding of the affected areas. to seal hairline cracks.
Step 3: Improve Drainage
Drainage is the heart of any waterproofing system. Begin by ensuring that your basement has a properly functioning sump pump. It should include a battery backup system to work even during power outages. Interior drain tiles or French drains can also be installed along the basement perimeter to collect and channel water to the sump basin.
Outside, clear gutters regularly and extend downspouts at least six feet from your foundation. If the ground slopes toward your house, regrade it to divert water away effectively. and interior drain tiles.
Step 4: Apply Waterproof Coatings
Coat interior walls with waterproof sealants or elastomeric paint to block moisture from entering through porous concrete or masonry. These coatings act as a first barrier, helping reduce condensation and seepage.
For long-term results, apply two coats and cover all wall surfaces uniformly. Be sure the basement is completely dry before application to ensure strong adhesion. or sealants on interior basement walls.
Step 5: Control Interior Humidity
Even after sealing walls and installing drains, humidity can still build up. Use dehumidifiers, install exhaust fans in laundry or bathroom areas, and ensure proper ventilation throughout the space. Aim for indoor humidity levels below 60%.
Check for hidden moisture traps like storage boxes or uninsulated pipes that can foster mold. Also consider insulating cold water pipes to prevent condensation., use dehumidifiers, and improve airflow.
Step 6: Test Before Building
Before moving on to finishes like drywall, flooring, or trim, conduct a thorough moisture test. Use a thermal camera or place a sheet of plastic against the wall for 24–48 hours to check for condensation.
Only proceed with basement finishing once you’re confident the space is completely dry. This small precaution helps avoid expensive rework later. or thermal camera to confirm dry conditions.
Foundation Waterproofing Explained
Many homeowners overlook foundation waterproofing until it’s too late. However, this form of protection is one of the most effective ways to secure your home from long-term water damage. Unlike interior solutions that deal with water after it has entered, foundation waterproofing prevents it from ever penetrating your basement walls. The process typically includes applying a waterproof membrane, installing a drainage board, and ensuring proper backfill grading. These measures create a reliable barrier that directs water away from your foundation and keeps your living space dry and safe year-round.
Foundation waterproofing is a permanent solution for structural moisture problems. This method involves coating the exterior of your foundation walls with waterproof membranes, managing soil grading, and sometimes installing a full perimeter drain system.
If your home is older or you see horizontal wall cracks, this method should not be skipped. It protects your finished basement long-term.
DIY vs Hiring a Professional
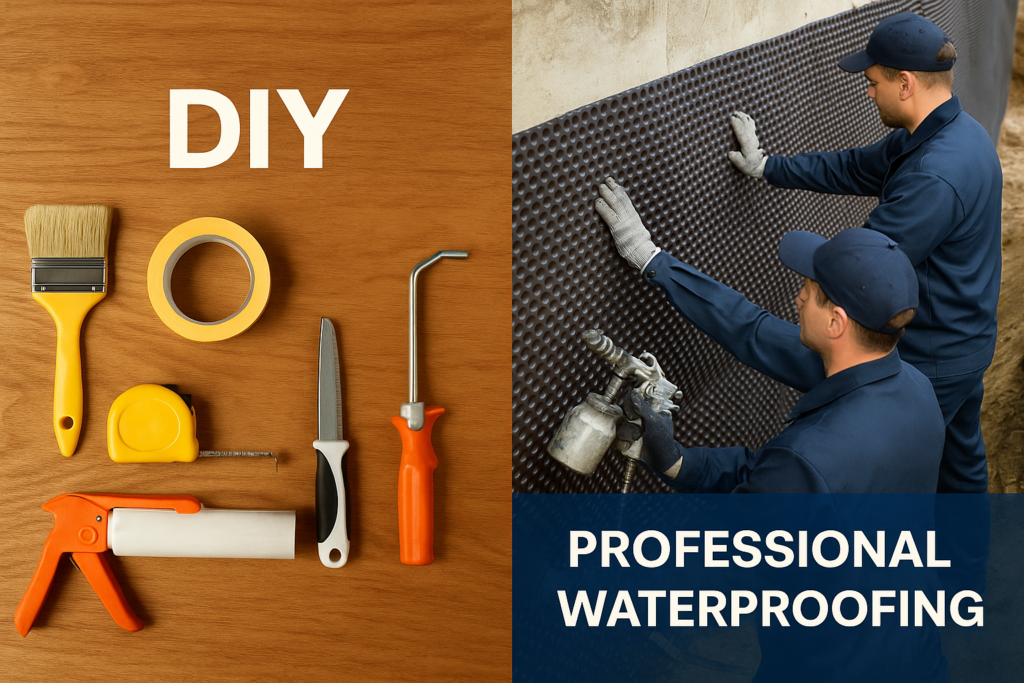
One of the most important decisions in basement waterproofing is choosing between doing it yourself or hiring a professional. While DIY methods can save money and work for minor issues, they may not address deeper structural problems or long-term drainage needs. Professionals bring expertise, tools, and warranties that offer peace of mind. This section helps you assess the complexity of your issue and decide the best path forward based on your goals, budget, and confidence level.
DIY Waterproofing
Suitable for:
- Minor leaks or damp spots
- Basic vapor barrier installation
- Plugging visible cracks
When to Hire a Pro
Look up basement waterproofing near me when:
- There is standing water
- You notice wall bowing or foundation shifts
- Interior fixes aren’t enough
Professionals bring expertise, proper materials, and offer warranties.
Cost Breakdown & ROI
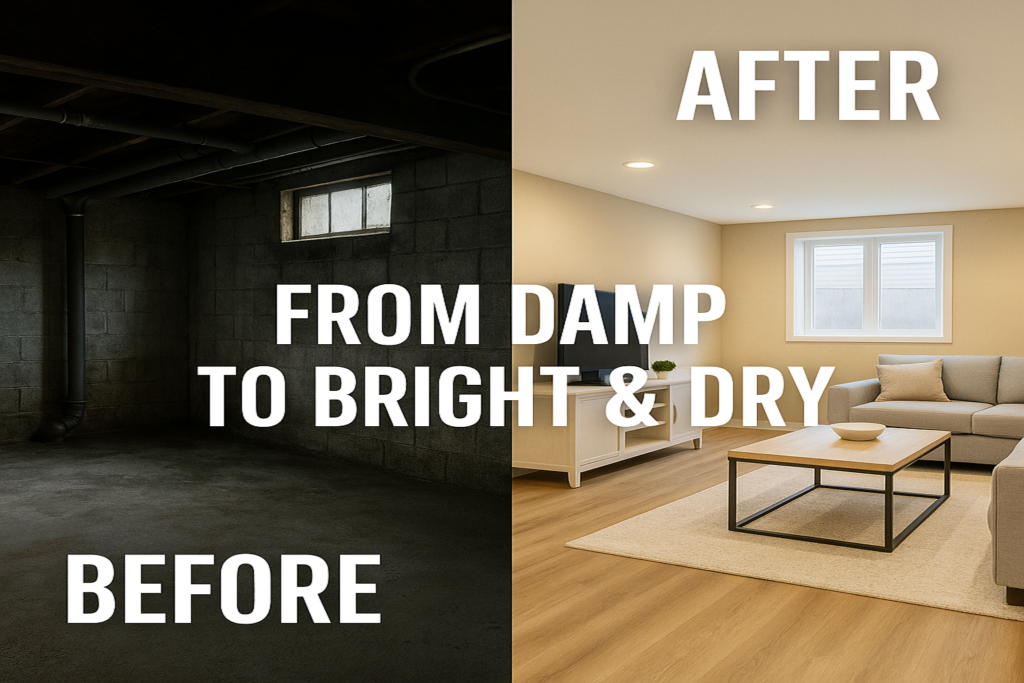
Understanding the cost of waterproofing helps set realistic expectations and avoid budget surprises. Interior methods like sealants and sump pumps are generally more affordable and quicker to implement. Exterior waterproofing, while costlier, offers robust, long-term protection and is often essential in high-water table areas or homes with historic leakage issues. While the initial investment may seem steep, the return in peace of mind, increased home value, and avoided damage expenses makes it worthwhile. A dry, finished basement not only adds square footage but enhances overall livability and buyer appeal.
Waterproofing costs vary based on method and severity. Here’s a general breakdown:
- Interior solutions: $500–$3,000
- Exterior waterproofing: $5,000–$15,000
- Foundation repair with waterproofing: Up to $20,000
However, finishing a wet basement without this prep can cost even more in repairs. Waterproofing not only protects investment but also boosts property value significantly.
FAQs
How long does basement waterproofing take?
The duration ranges from 1 to 7 days, depending on the method—interior waterproofing is usually quicker than extensive exterior excavation.
Can I waterproof a basement from the inside only?
Yes—for minor leaks and dampness, interior waterproofing may be enough. But combining it with exterior methods offers the most complete protection.
What’s the best method for old basements?
Older basements benefit from a dual approach: interior sealing for current moisture and foundation waterproofing to prevent future infiltration.
Are basement waterproofing solutions permanent?
While not truly permanent, high-quality systems can last 20+ years. Routine inspections and maintenance extend their effectiveness significantly.
Can waterproofing increase my home value?
Absolutely. A dry, finished basement is a major selling point for buyers—especially in older or flood-prone areas. It signals a well-maintained and safe home. Yes, waterproofing can significantly increase your home’s resale appeal. Buyers view a dry, finished basement as a major asset—especially in flood-prone areas or older homes.
What’s the difference between damp proofing and waterproofing?
Damp proofing prevents soil moisture from entering the basement but does not stop water under pressure. Waterproofing, on the other hand, blocks both moisture and water from entering the basement, making it the superior choice for a finished space.
Do all basements need waterproofing before finishing?
Yes. Even if your basement appears dry, waterproofing is essential to ensure that seasonal changes, hidden leaks, or future structural shifts don’t compromise your renovation. Prevention is far more cost-effective than repair.
How long does basement waterproofing take?
1–7 days depending on interior vs exterior solutions.
Can I waterproof a basement from the inside only?
Yes—for mild issues. But combining it with exterior methods is ideal.
What’s the best method for old basements?
A mix of interior sealing and foundation waterproofing, especially if no exterior barrier exists.
Are basement waterproofing solutions permanent?
While no system is truly permanent, professionally installed waterproofing can last decades if properly maintained. Regular inspections and maintaining drainage systems go a long way in preserving effectiveness.
Can waterproofing increase my home value?
Yes, waterproofing can significantly increase your home’s resale appeal. Buyers view a dry, finished basement as a major asset—especially in flood-prone areas or older homes.
Conclusion
Waterproofing is the most important investment before finishing your basement. It keeps moisture out, ensures air quality, and prevents costly damage. Whether you’re exploring waterproofing inside basement options or searching for basement waterproofing near me to hire experts, start with a dry, stable foundation.
Ready to protect your basement? Let Absolute Renovations ensure it’s finished the right way—dry, durable, and investment-ready.